Continuing from the previous post, this time we will implement the functionality to compose and send emails using the Mail.Send permission of the Graph API.
We'll continue using the project created in the previous post.
The process pattern is somewhat established at this point:
Step 1: Add Mail.Send permission
Step 2: Create a ViewModel for sending emails
Step 3: Create a View for composing and sending emails
Step 4: Add the Action Method for sending emails
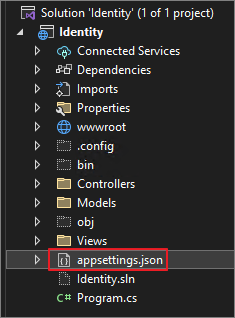
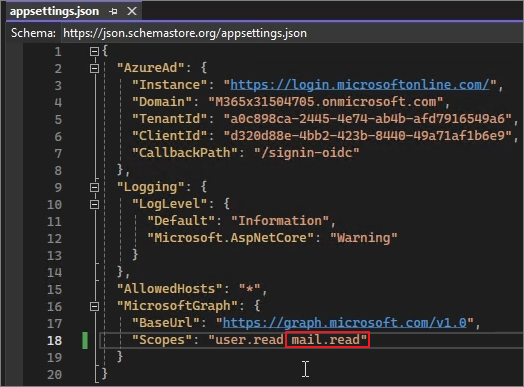
Step 1. Add Mail.Send permission
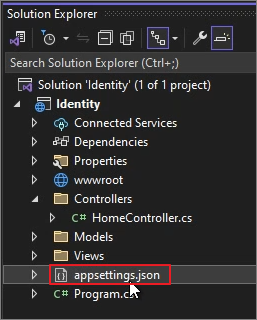
Appsettings.json
Add Mail.Send permission.
Step 2. Create a View Model for Sending Emails
Create the EmailSendViewModel to hold the data needed for sending emails. This model will include fields like recipient address, email subject, and email body.
Create the EmailSendViewModel class
public class EmailSendViewModel
{
        public string To { get; set; } = string.Empty;
        public string Subject { get; set; } = string.Empty;
        public string Body { get; set; } = string.Empty;
}
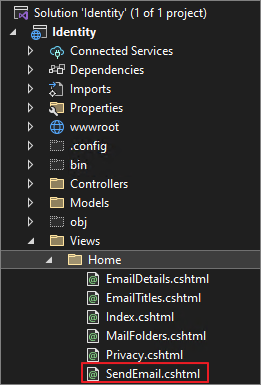
Step 3. Create a View for Sending Emails
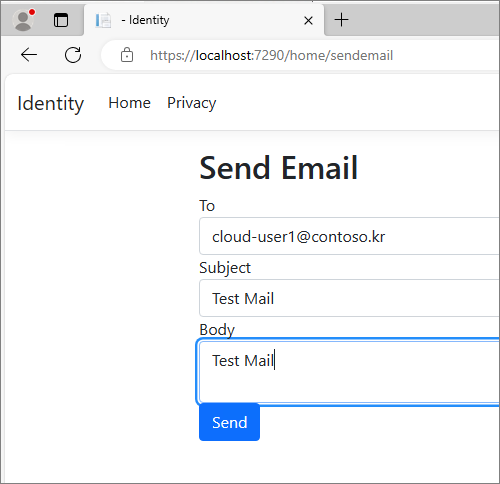
Create a view (SendEmail.cshtml) in the Views/Home directory, where users can compose and send emails. This view will use the EmailSendViewModel as its model.
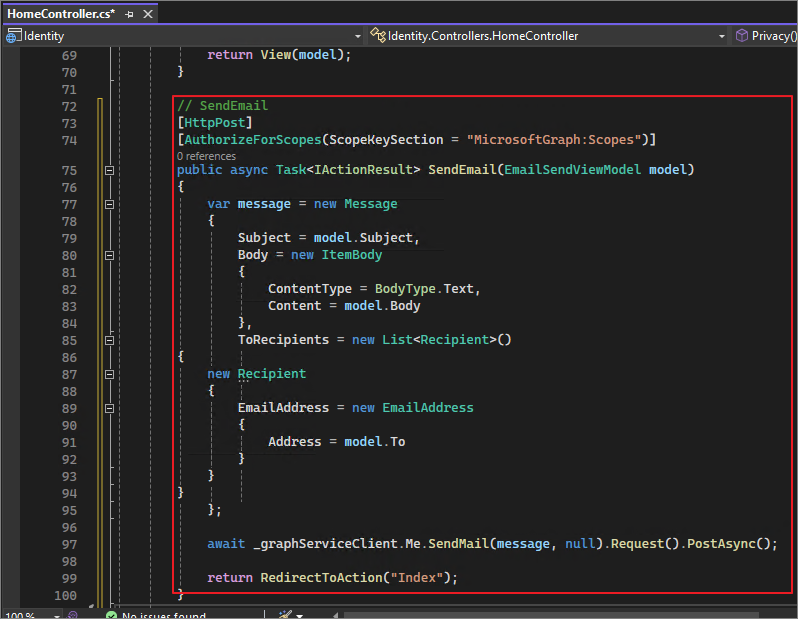
Add the SendEmail action method to the HomeController. This method accepts EmailSendViewModel as a parameter and sends an email using the Microsoft Graph API.
Modify HomeController.cs.
Add the following content.
// GET action method to display the email sending form
[HttpGet]
public IActionResult SendEmail()
{
    return View(new EmailSendViewModel()); // Pass an empty model to the view
}

// Sendemail
[HttpPost]
[AuthorizeForScopes(ScopeKeySection = "MicrosoftGraph:Scopes")]
public async Task<IActionResult> SendEmail(EmailSendViewModel model)
{
    var message = new Message
    {
        Subject = model.Subject,
        Body = new ItemBody
        {
            ContentType = BodyType.Text,
            Content = model.Body
        },
        ToRecipients = new List<Recipient>()
        {
            new Recipient
            {
                EmailAddress = new EmailAddress
                {
                    Address = model.To
                }
            }
        }
    };

    await _graphServiceClient.Me.SendMail(message, null).Request().PostAsync();

    return RedirectToAction("Index");
}
Continuing from the previous post, this time we will use the Mail.Read permission in the Graph API to retrieve mail folders, subject lines, and content, and publish them on IIS.
We will continue using the project created in the previous post.
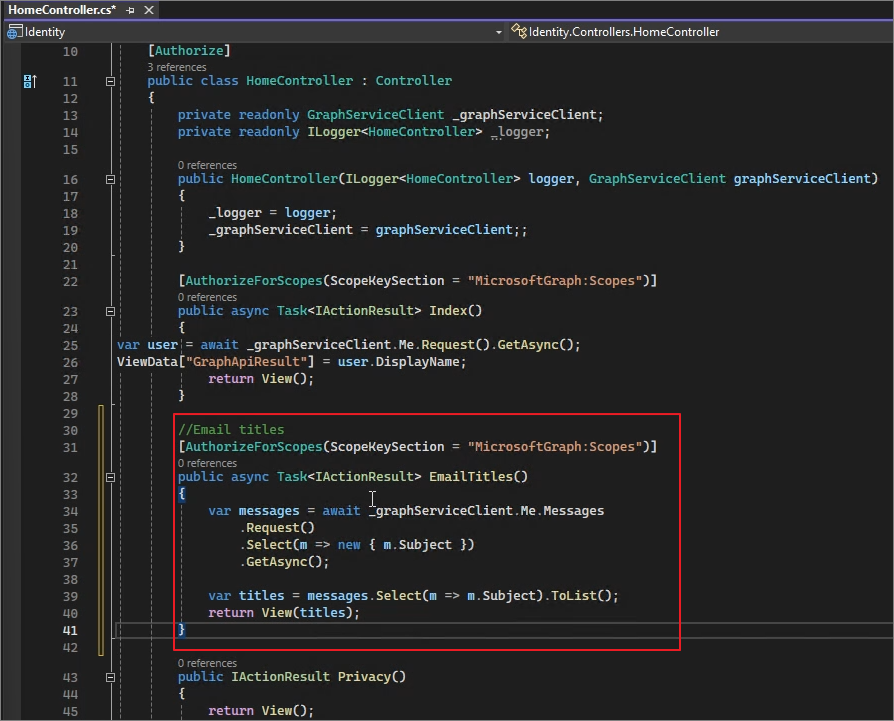
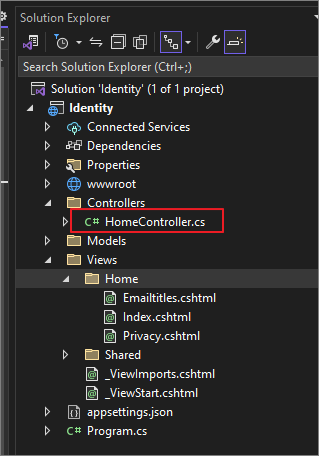
Add the //Email Titles section to the existing code as shown below.
using Identity.Models;
using Microsoft.AspNetCore.Authorization;
using Microsoft.AspNetCore.Mvc;
using System.Diagnostics;
using Microsoft.Graph;
using Microsoft.Identity.Web;
namespace Identity.Controllers
{
[Authorize]
public class HomeController : Controller
{
private readonly GraphServiceClient _graphServiceClient;
private readonly ILogger<HomeController> _logger;
public HomeController(ILogger<HomeController> logger, GraphServiceClient graphServiceClient)
{
_logger = logger;
_graphServiceClient = graphServiceClient;
}
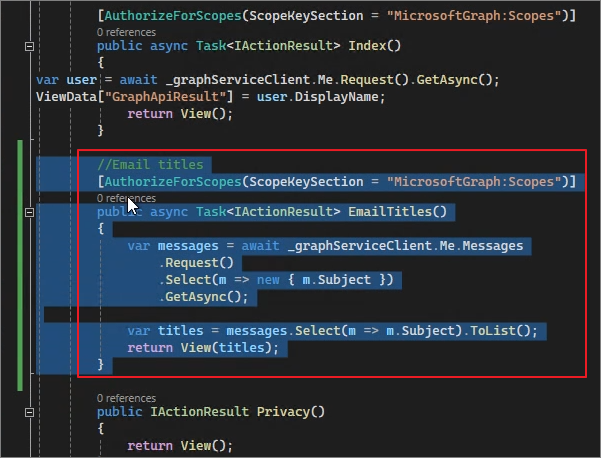
[AuthorizeForScopes(ScopeKeySection = "MicrosoftGraph:Scopes")]
public async Task<IActionResult> Index()
{
var user = await _graphServiceClient.Me.Request().GetAsync();
ViewData["GraphApiResult"] = user.DisplayName;
return View();
}
// Email Titles
[AuthorizeForScopes(ScopeKeySection = "MicrosoftGraph:Scopes")]
public async Task<IActionResult> EmailTitles()
{
var messages = await _graphServiceClient.Me.Messages
.Request()
.Select(m => new { m.Subject })
.GetAsync();
var titles = messages.Select(m => m.Subject).ToList();
return View(titles);
}
public IActionResult Privacy()
{
return View();
}
[AllowAnonymous]
[ResponseCache(Duration = 0, Location = ResponseCacheLocation.None, NoStore = true)]
public IActionResult Error()
{
return View(new ErrorViewModel { RequestId = Activity.Current?.Id ?? HttpContext.TraceIdentifier });
}
}
}
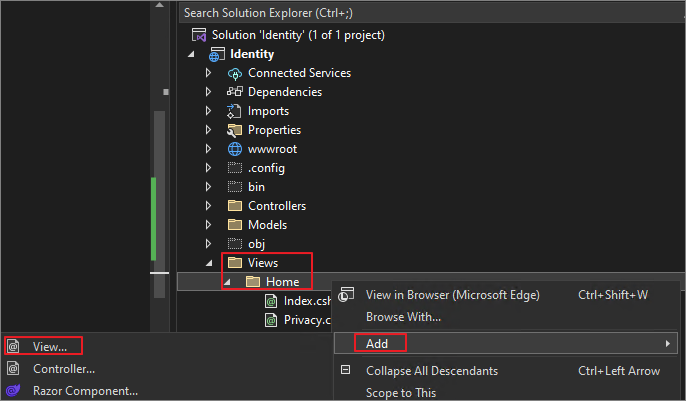
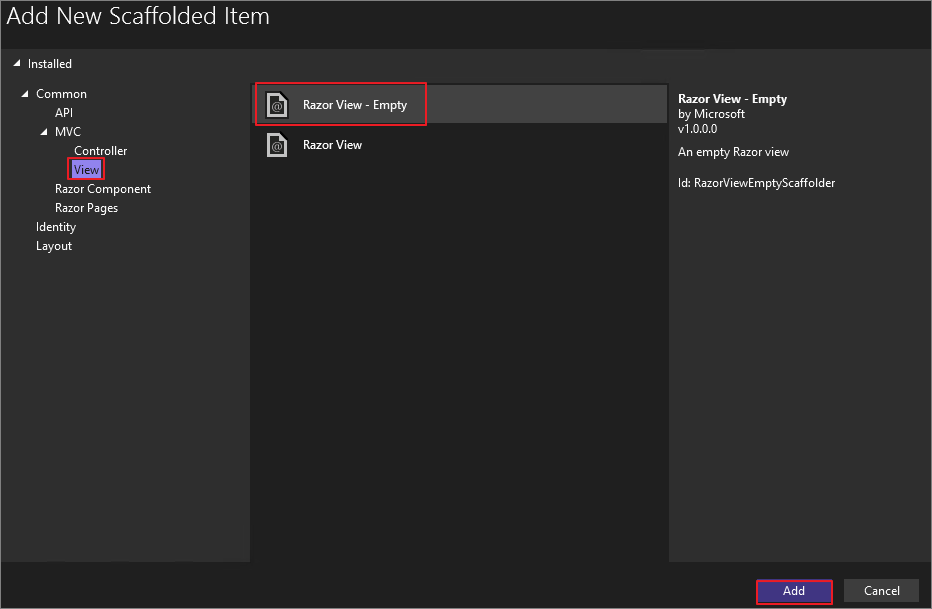
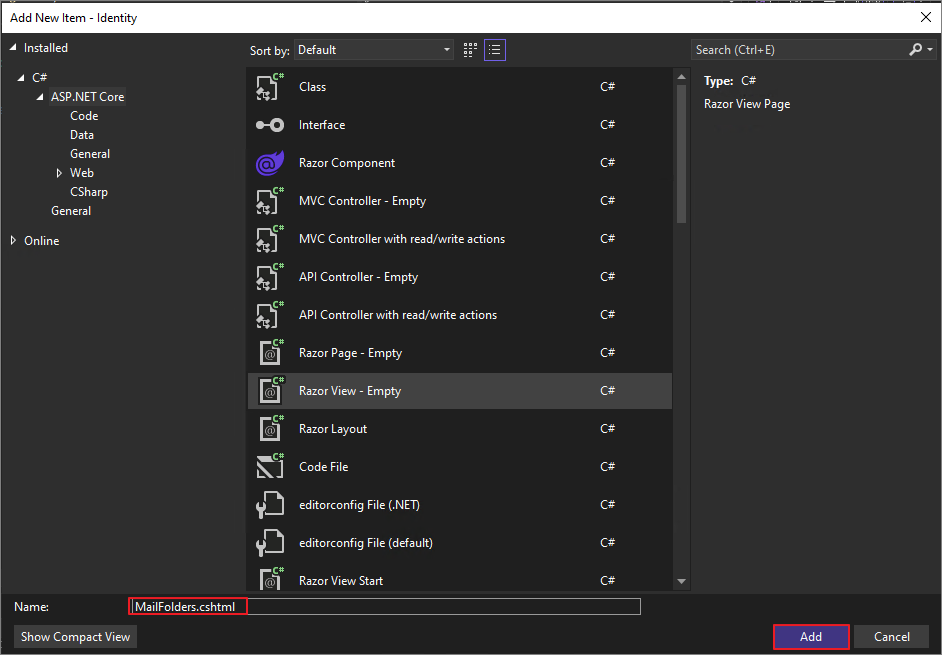
Create the View.
Views -> Home -> Add -> View
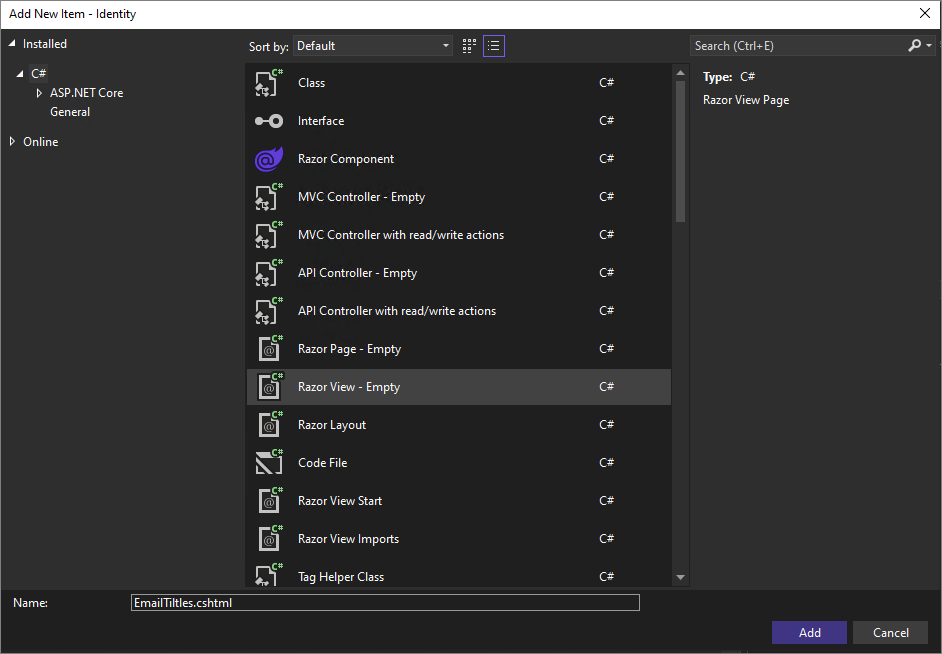
Razor View -> Empty -> Add
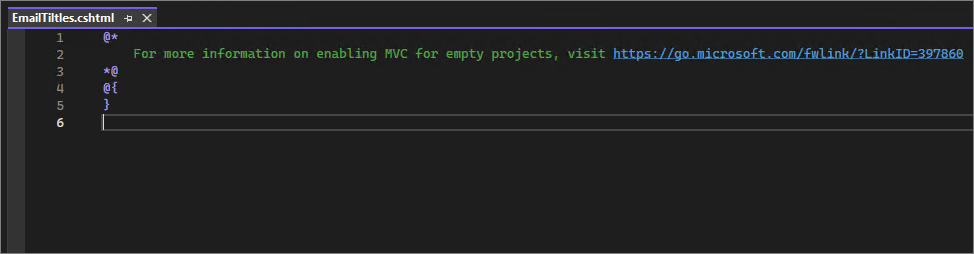
EmailTitles.cshtml -> Add
It will be generated as shown below.
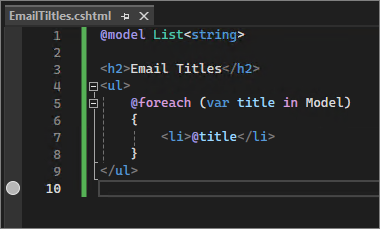
Modify the content as follows.
@model List<string>

<h2>Email Titles</h2>
<ul>
@foreach (var title in Model)
{
    <li>@title</li>
}
</ul>
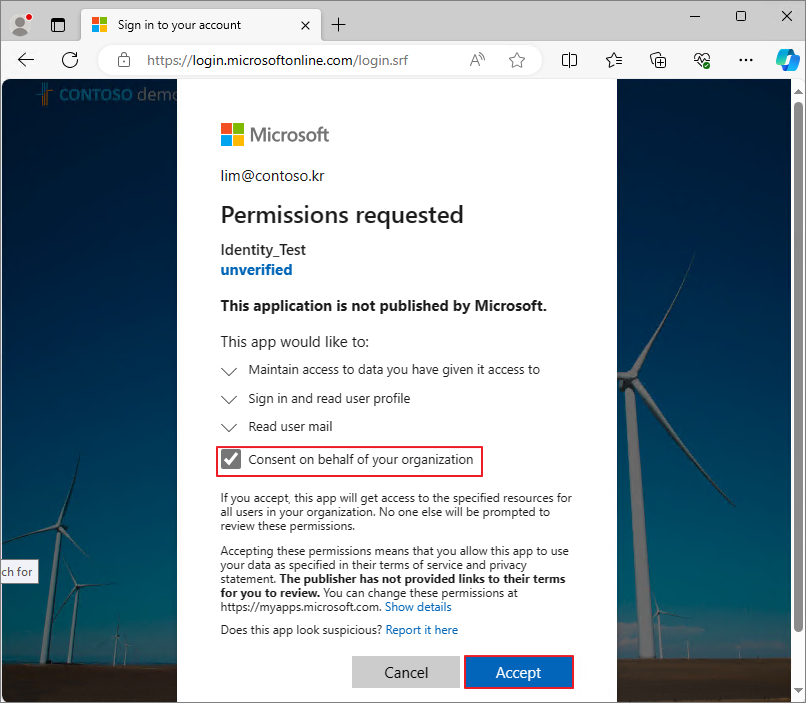
Start Debuging -> Log in -> Verify permissions and click Accept.
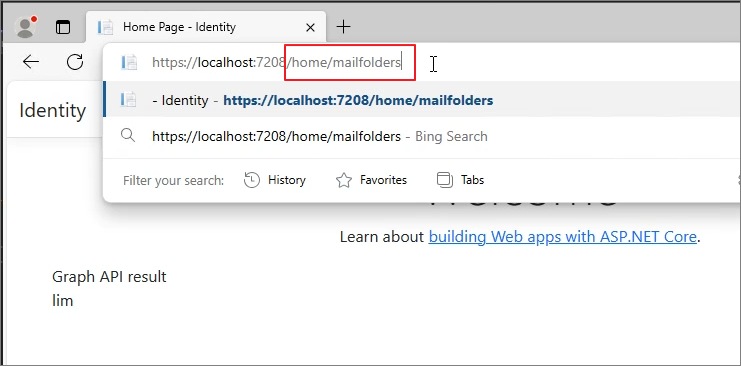
When you navigate to the Home/emailtitles URL, it will be displayed as shown below.
When compared with OWA (Outlook Web App), you can see that only the email subjects have been retrieved.
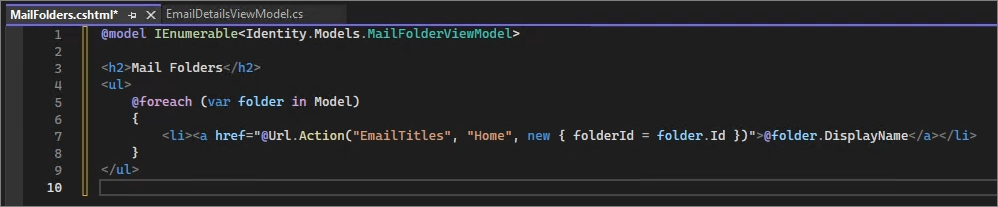
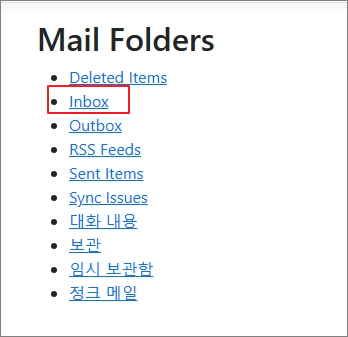
This time, let's create a page that retrieves and displays emails in the following structure: Folder -> Subject -> Body.
Step2. Action Method
Action Methods in the controller handle HTTP requests and retrieve data by calling the Microsoft Graph API. We will implement Action Methods such as MailFolders, EmailTitles, and EmailDetails to fetch the list of mail folders, the list of emails in a specific folder, and the detailed content of an email, respectively.
Modify the HomeController.cs file
Remove the existing Email Titles code.
Insert the code for Mail Folders, Titles, and Details respectively.
//MailFolders
public async Task<IActionResult> MailFolders()
{
var mailFolders = await _graphServiceClient.Me.MailFolders
.Request()
.GetAsync();
return View(mailFolders.CurrentPage.Select(f => new MailFolderViewModel { Id = f.Id, DisplayName = f.DisplayName }).ToList());
}
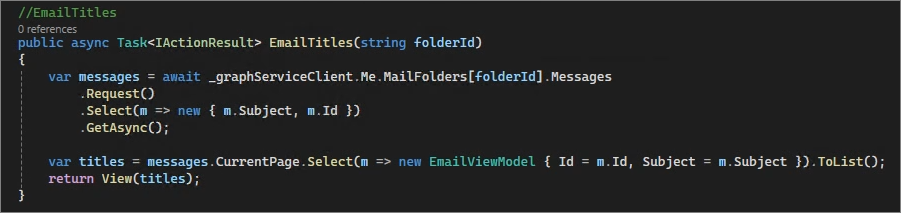
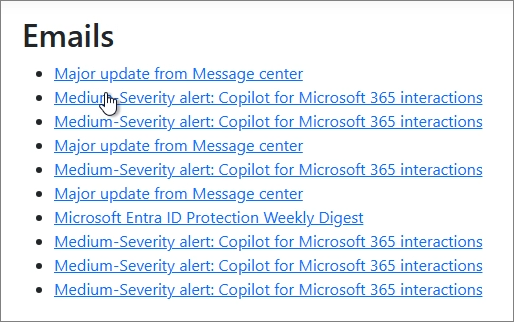
//EmailTitles
public async Task<IActionResult> EmailTitles(string folderId)
{
var messages = await _graphServiceClient.Me.MailFolders[folderId].Messages
.Request()
.Select(m => new { m.Subject, m.Id })
.GetAsync();
var titles = messages.CurrentPage.Select(m => new EmailViewModel { Id = m.Id, Subject = m.Subject }).ToList();
return View(titles);
}
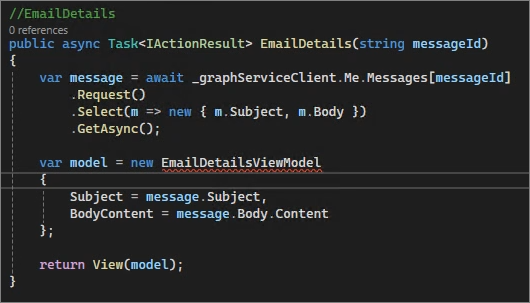
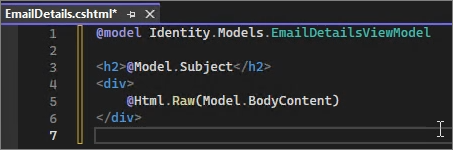
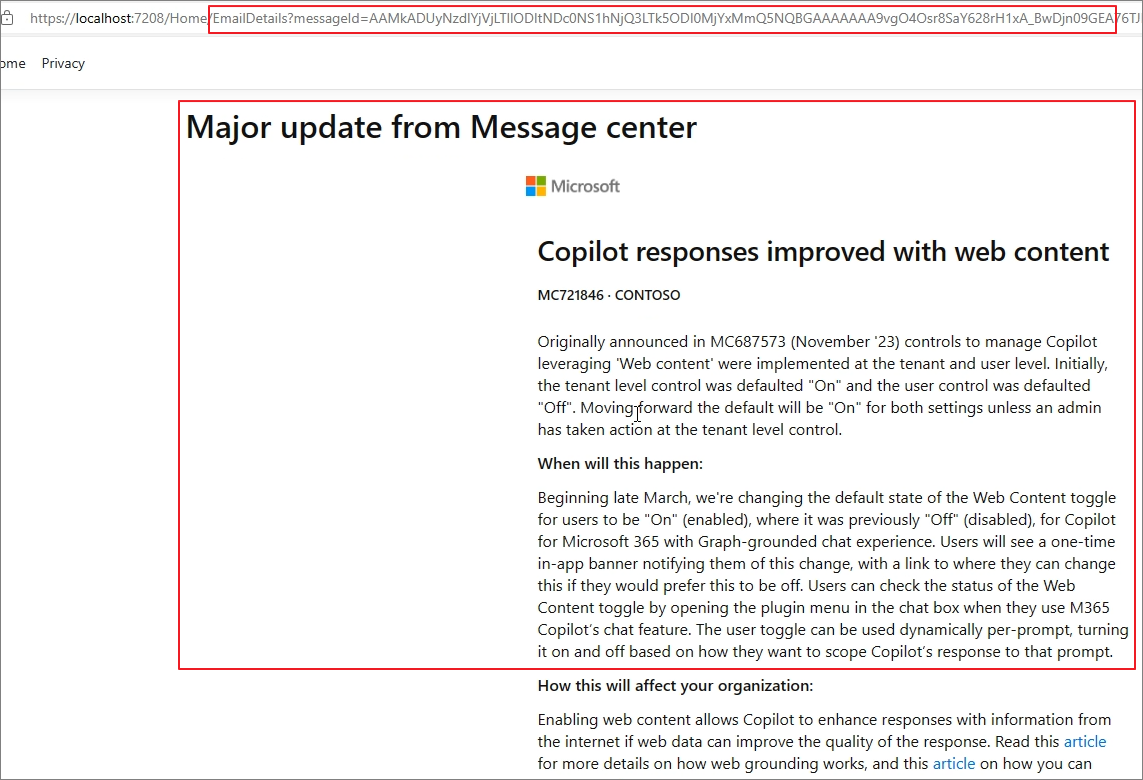
//EmailDetails
public async Task<IActionResult> EmailDetails(string messageId)
{
var message = await _graphServiceClient.Me.Messages[messageId]
.Request()
.Select(m => new { m.Subject, m.Body })
.GetAsync();
var model = new EmailDetailsViewModel
{
Subject = message.Subject,
BodyContent = message.Body.Content
};
return View(model);
}
Step3. View model
A View Model is a model used to pass data to the View and is used to define the data retrieved from the Action Method. For example, the EmailViewModel includes the email's ID and subject. This allows the data needed in the view to be structured and managed efficiently.
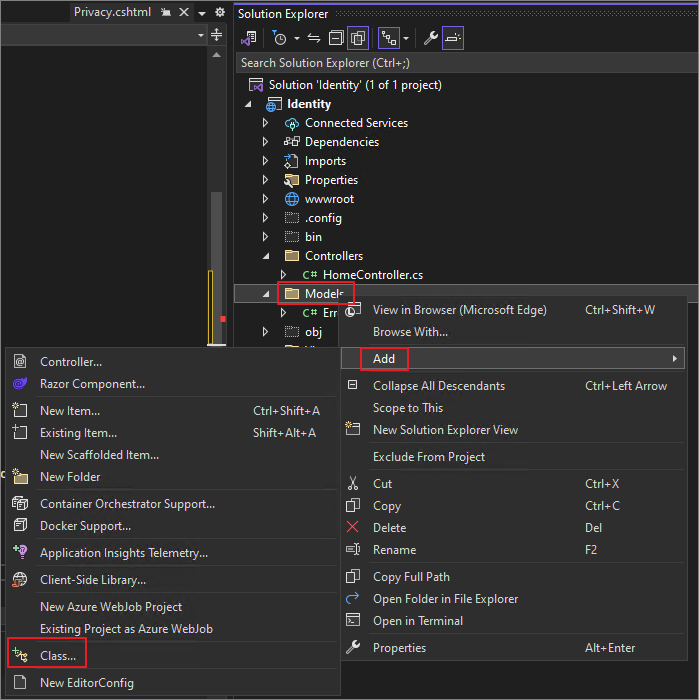
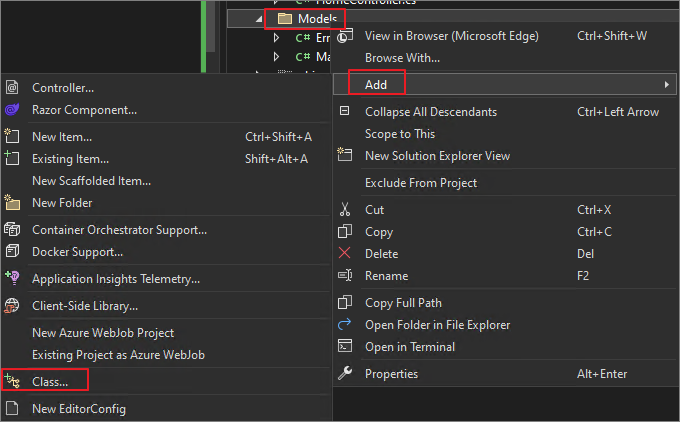
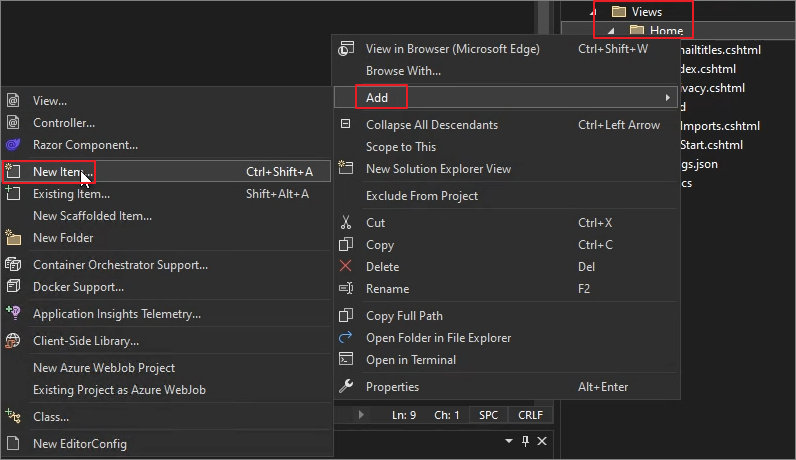
Right-Click on the Models folder -> Add -> Class
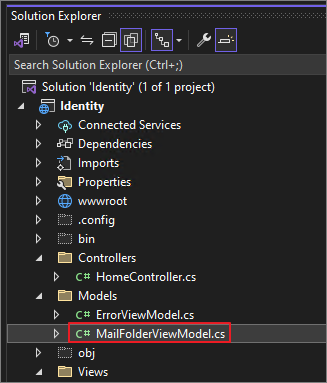
MailFolderViewModel.cs -> Add
It will be generated as shown below.
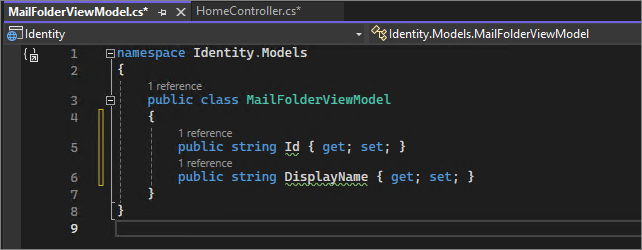
Modify it as shown below.
namespace Identity.Models
{
    public class MailFolderViewModel
    {
        public string Id { get; set; }
        public string DisplayName { get; set; }
    }
}
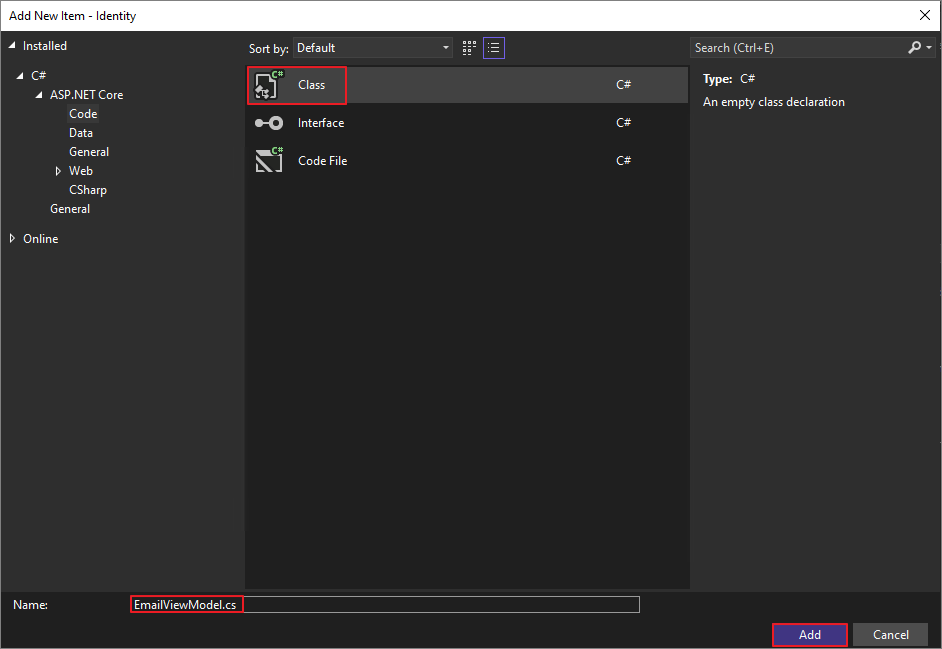
Similarly, go to Models -> Add -> Class.
EmailViewModel.cs -> Next
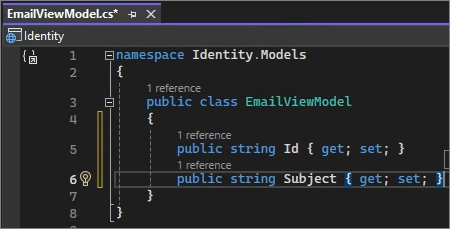
Modify it as shown below -> Save.
namespace Identity.Models
{
    public class EmailViewModel
    {
        public string Id { get; set; }
        public string Subject { get; set; }
    }
}
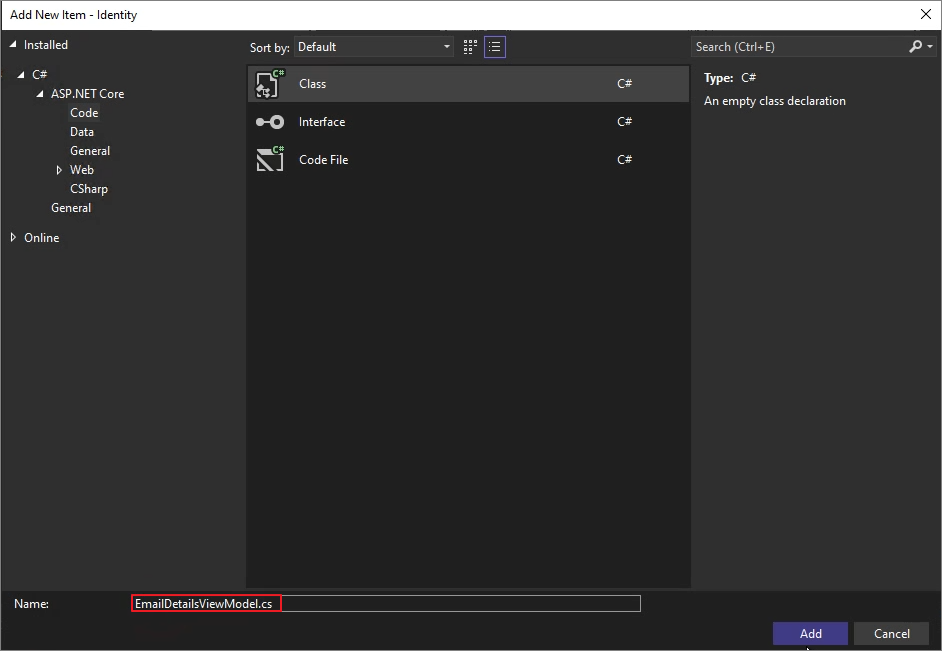
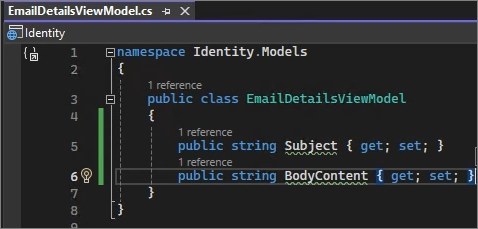
Add EmailDetailsViewModel.cs in the same way.
Modify it as shown below -> Save.
public class EmailDetailsViewModel
{
    public string Subject { get; set; }
    public string BodyContent { get; set; }
}
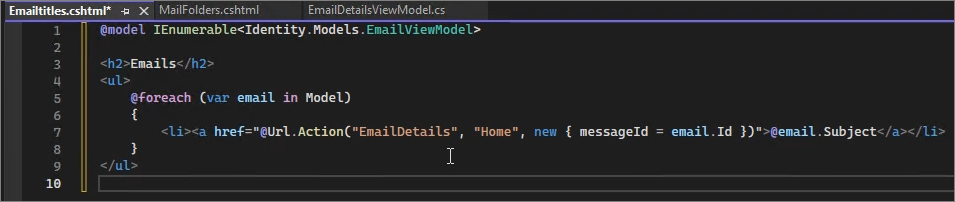
Step 4. View
Finally, the View constructs the user interface and displays the data received from the View Model. Create corresponding view files for each action in the Views/Home directory.