While creating a YouTube video, I also decided to write this blog post. I revisited DAG configuration after a long time, thinking it would be useful when setting up a test environment for the upcoming Subscription Edition upgrade.
In Korea, DAG is often referred to as "redundancy." It is a feature in Exchange Server that provides automatic failover in case of database issues. A more detailed explanation involves multiple scenarios, but for now, I will keep it simple and focus on the basic setup.
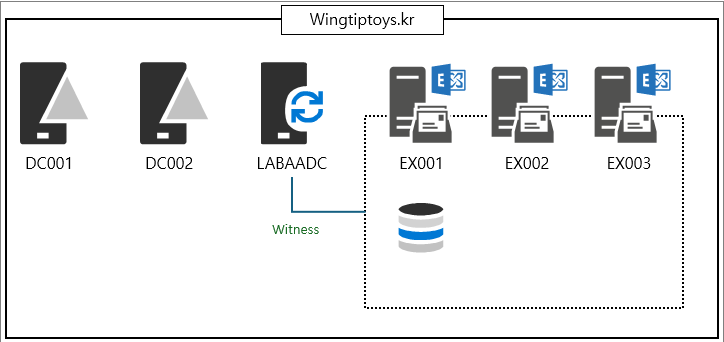
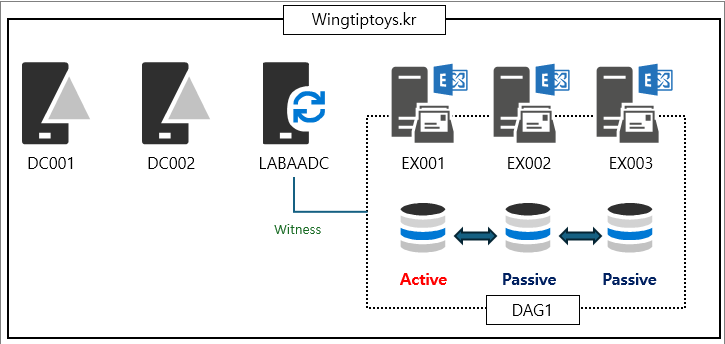
The environment and specifications remain the same as in the previous post, with three Exchange Servers making up the DAG. The final architecture is as follows:
IPLess DAG Configuration
This time, I am using the IPLess configuration approach.
The IPLess configuration has the following characteristics:
No IP address is assigned to the cluster/DAG, so there is no IP resource in the cluster core resource group.
No network name is assigned to the cluster, meaning there is no network name resource in the cluster core resource group.
The cluster/DAG name is not registered in DNS and cannot be resolved on the network.
A Cluster Name Object (CNO) is not created in Active Directory.
The cluster cannot be managed using Failover Cluster Manager but must be managed using Windows PowerShell, with cmdlets executed on individual cluster members.
I asked GPT to compare the traditional DAG approach with the IPLess approach, and the results are summarized in the table below:
Active Directory Dependency
Requires CNO and AD objects
No AD objects required
IP Address
Requires static IP
No IP required
DNS Registration
Required
Not required
Failover Speed
Relatively slower
Relatively faster
Management Complexity
Requires AD and network management
Reduced management burden
Security Concerns
Requires AD object management and permissions
No AD objects needed
If there are no compatibility issues with third-party solutions, IPLess DAG is recommended.
Prerequisites
When setting up a DAG, the disk structure must be identical across all servers. If the DB disk is set as drive D: on one server, all other servers must also configure their DB disks as drive D:
Step 1. Creating the Witness Directory
Before proceeding, let's understand what a Witness is.
1. What is a Witness Server?
A Witness Server is a server that provides a quorum vote to maintain the cluster quorum within a Database Availability Group (DAG). A DAG requires an odd number of votes (Quorum) to function properly, and the Witness Server helps achieve this.
DAGs operate as Windows Failover Clusters consisting of multiple Mailbox Servers, maintaining a quorum for high availability. If the number of Mailbox Servers in the DAG is even (e.g., 2, 4, 6...), an additional vote is needed, which is provided by the Witness Server.
You might wonder why a Witness is necessary when there are already three servers in the DAG. GPT provided the following explanation:
Server Count
Total Votes (Including Witness)
Operation Status
Quorum Status
All 3 servers operational
4 (3 servers + 1 Witness)
✅ Running normally
OK (4/2 = 2 or more required)
1 server fails (2 remaining)
3 (2 servers + 1 Witness)
✅ Running normally
OK (3/2 = 1.5 → Rounded to 2)
2 servers fail (1 remaining)
2 (1 server + 1 Witness)
✅ Running normally
OK (2/2 = 1 or more required)
All servers fail (0 remaining)
1 (Witness only)
❌ DAG stops
Failed (1/2 = 0.5 → Less than 1 required)
To ensure stable operation, a Witness is essential.
2. What is a Witness Directory?
A Witness Directory is a shared folder on the Witness Server used for DAG operations. It stores files that record the cluster state and helps determine quorum status during a failover.
Default Witness Folder Settings:
A shared folder must be created on the Witness Server.
Typically located at C:\DAGWitness.
The Witness Server must be able to communicate with all Mailbox Servers in the DAG.
The Exchange Trusted Subsystem group must have Read/Write permissions on the folder.
The Witness Server must be a separate system, and a Witness folder must be created on it. In my setup, I am using the Azure AD Connector server as the Witness Server (recently renamed to Entra ID Connect).
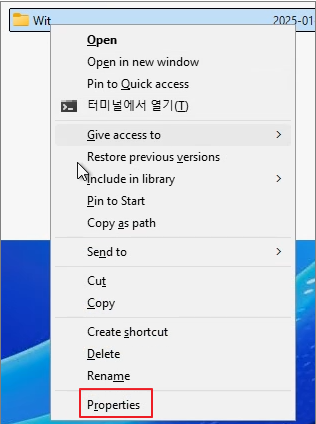
Creating the Witness Folder on the Witness Server
Right-click the folder -> Properties
Navigate to Sharing -> Share
Click Find People
Enter Exchange Trusted Subsystem -> Check Names -> OK
Set Permission Level: Read/Write -> Share
Click Done
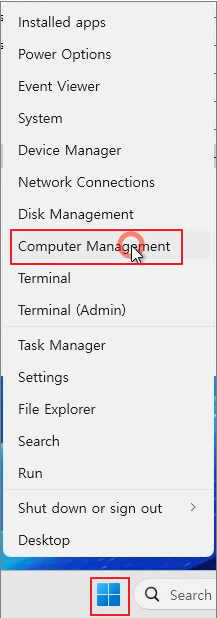
Right-click Start Button -> Computer Management
Go to Local Users and Groups -> Groups -> Administrators
Click Add
Enter Exchange Trusted Subsystem -> Check Names -> OK
The Witness folder is now created and configured with the necessary permissions.
Step 2. Configuring the DAG
Next, let's configure the Exchange Servers into a DAG.
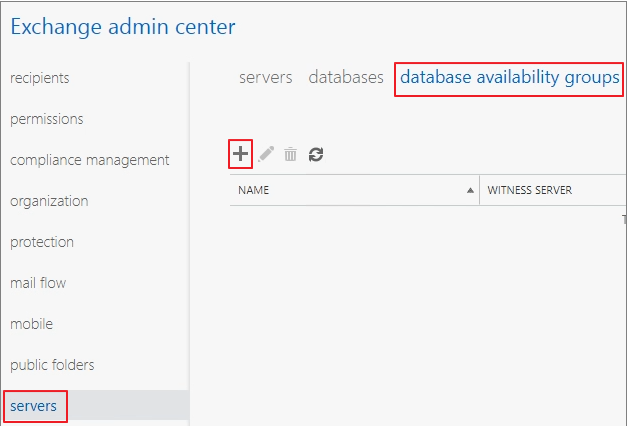
Open Exchange Admin Center (ECP) -> Servers -> Database Availability Groups -> Add
Specify the DAG name -> Enter Witness Server details -> Click Save
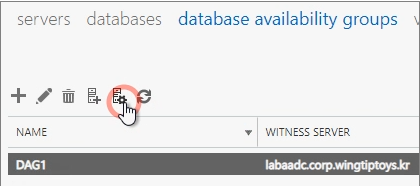
The DAG is created as shown below.
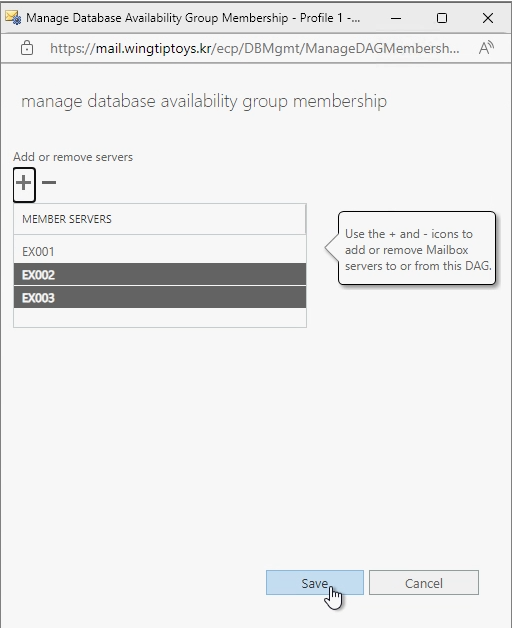
Click Manage DAG Membership
Add one Exchange Server first -> Click Save
The configuration process starts.
Add the remaining Exchange Servers using the same steps.
Step 3. Database Replication
After setting up the DAG, replicate the databases as follows:
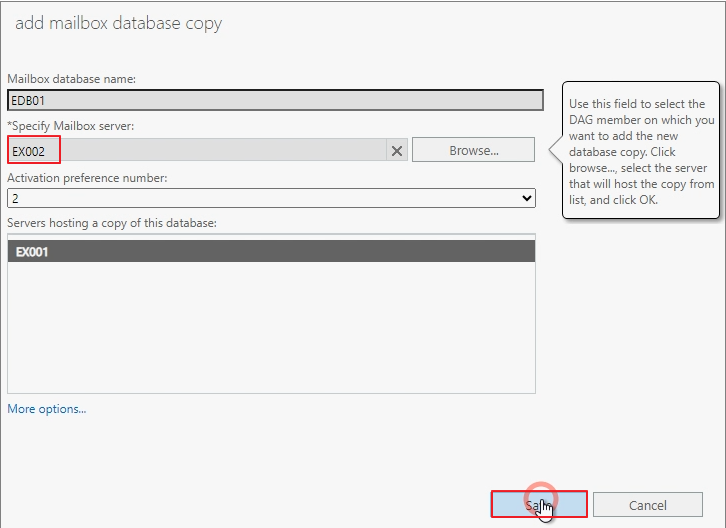
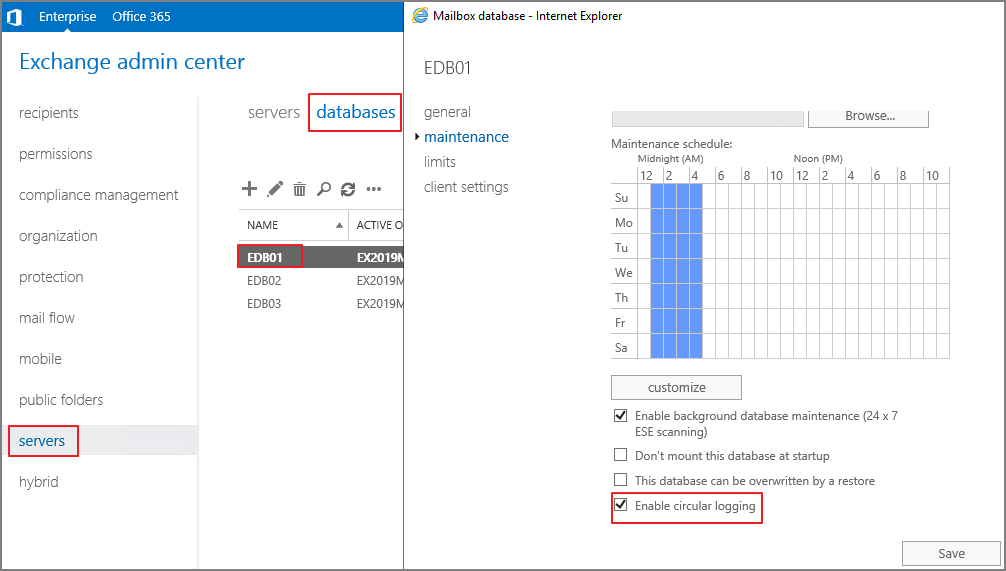
Navigate to Databases -> Select a DB -> Click Add Database Copy
Add the Exchange Server -> Click Save
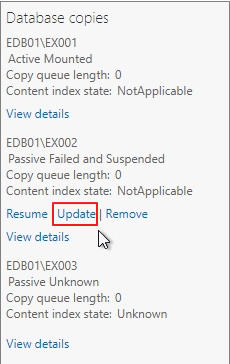
If circular logging is enabled, an error will occur. Disable circular logging before proceeding, then re-enable it later.
If an error occurs initially,
wait a moment and clickUpdateto force replication.
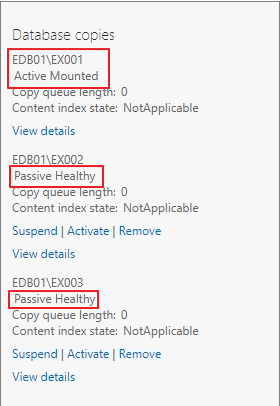
Once complete, verify that the replication status is Healthy.
Check the other servers to confirm that replication is functioning correctly.
With this setup, your Exchange Server DAG is now fully configured using the IPLess approach, providing high availability and redundancy.
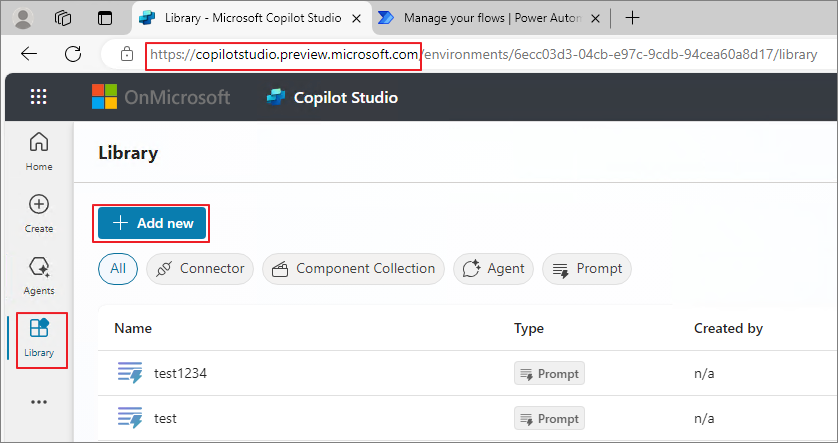
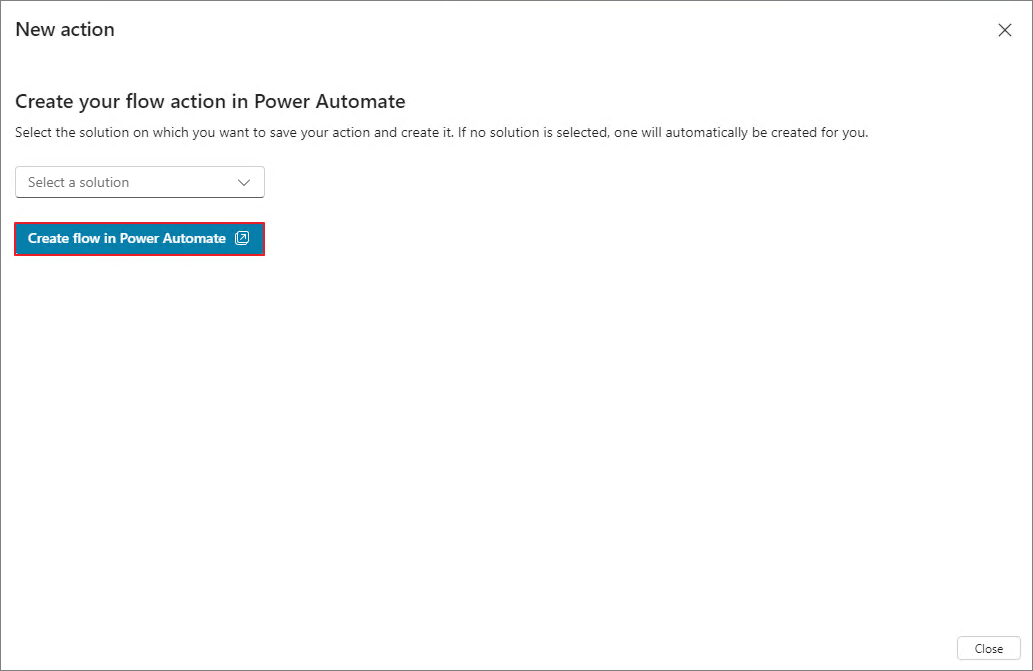
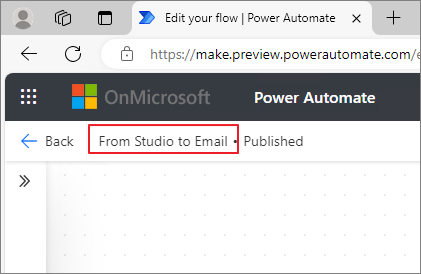
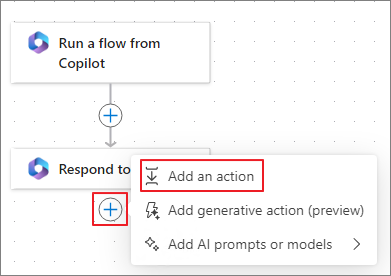
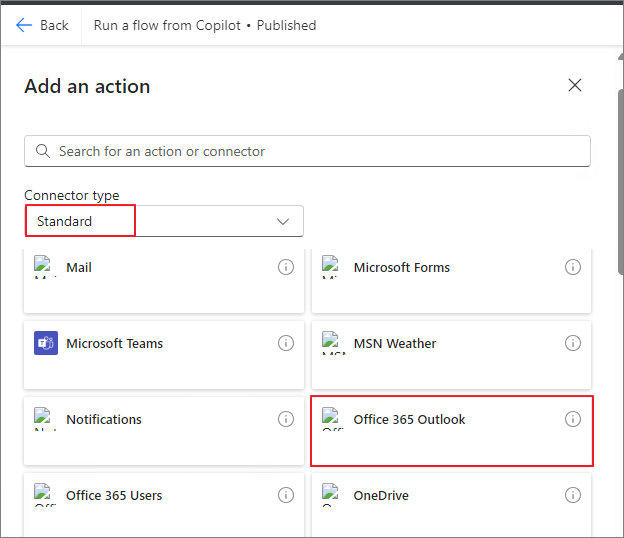
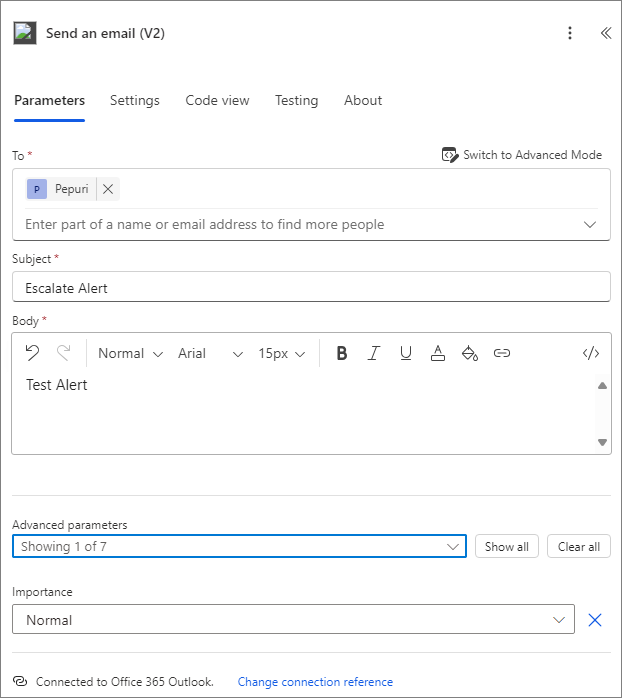
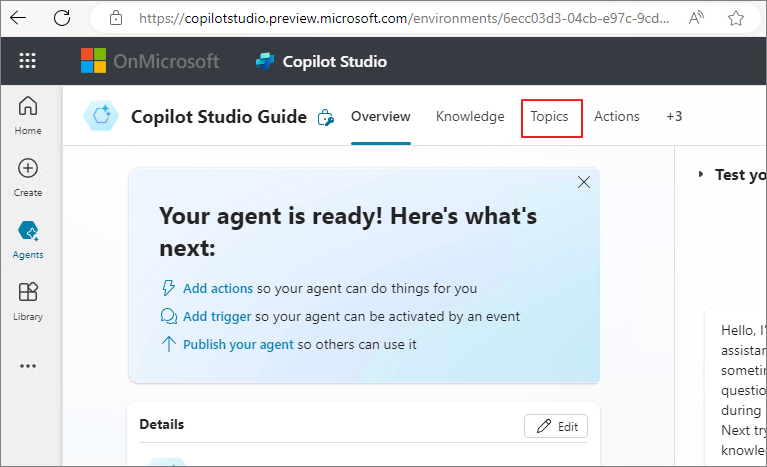
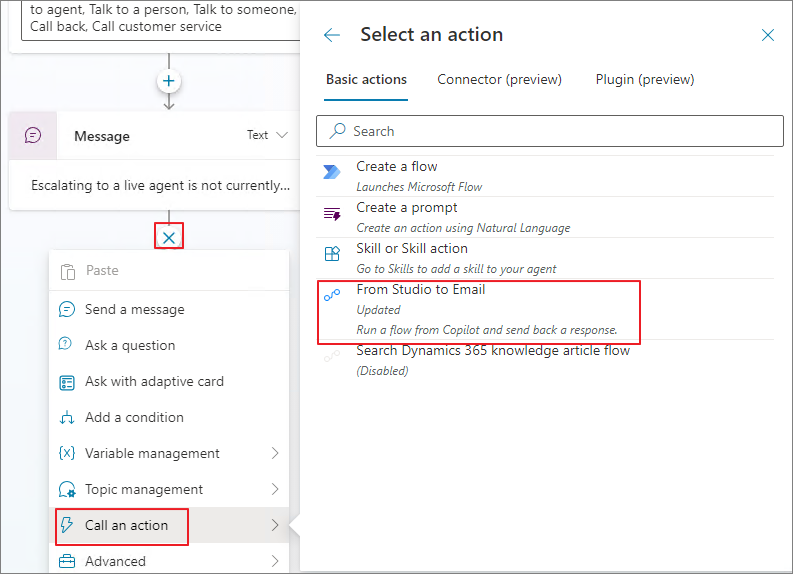
After reviewing that video, viewers requested a guide on how to configure alerts via Email. In this session, I will demonstrate how to create that flow. Recently, chatbots generated in Copilot Studio have been referred to as Agents. Unless there are changes, I will continue to define them as Agents. The environment is set to USA (Early), the browser language is set to English, and the work is being done using the Preview URL.
To enable connections from various clients like Outlook, proceed with configuring the virtual directories.
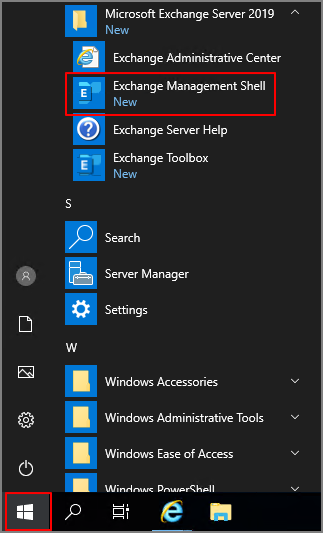
Run the Exchange Management Shell.
'
#Enter the URL to be used commonly across the virtual directories.
$url = "https://mail.wingtiptoys.kr"
$autodiscover = "https://autodiscover.wingtiptoys.kr"

#Set the Virtual Directory internal and external URLs to be identical.
#ECP
Get-EcpVirtualDirectory | Set-EcpVirtualDirectory -InternalUrl "$url/ecp"  -ExternalUrl "$url/ecp"
#EWS
Get-WebservicesVirtualDirectory | Set-WebservicesVirtualDirectory -InternalUrl "$url/ews/Exchange.asmx"  -ExternalUrl "$url/ews/Exchange.asmx"
#MAPI
Get-MapiVirtualDirectory | Set-MapiVirtualDirectory -InternalUrl "$url/mapi"  -ExternalUrl "$url/mapi"
#EAS
Get-ActiveSyncVirtualDirectory | Set-ActiveSyncVirtualDirectory -InternalUrl "$url/Microsoft-Server-ActiveSync"  -ExternalUrl "$url/Microsoft-Server-ActiveSync"
#OAB
Get-OabVirtualDirectory | Set-OabVirtualDirectory -InternalUrl "$url/oab"  -ExternalUrl "$url/oab"
#OWA
Get-OwaVirtualDirectory | Set-OwaVirtualDirectory -InternalUrl "$url/owa"  -ExternalUrl "$url/owa"

#Autodiscover
Get-ClientAccessService | Set-ClientAccessService -AutodiscoverServiceInternalUri "$autodiscover/autodiscover/autodiscover.xml"

#Run the following commands on each server.
IISReset
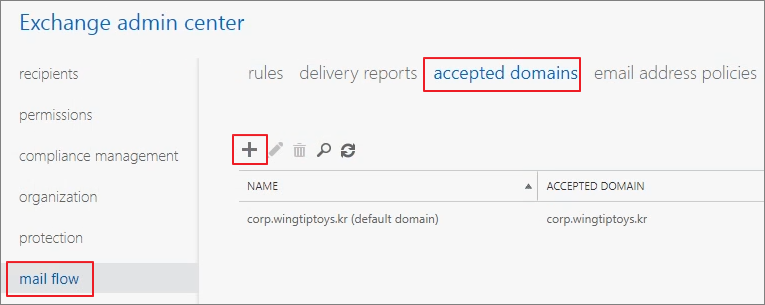
Step 3. Accepted Domain
If you create a domain like Corp. or .local in a test environment, you must add an accepted domain for the actual receiving address.
Go to Mail flow -> Accepted domains -> Click + (Add).
Add the domain.
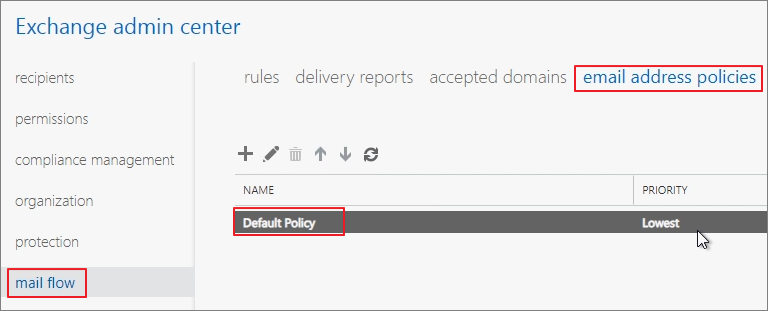
Step 4. Modify Email Address Policies
To ensure that newly created mailboxes are automatically assigned to the added domain, you need to modify the Email Address Policies.
Mail flow -> email address policies -> Default Policy
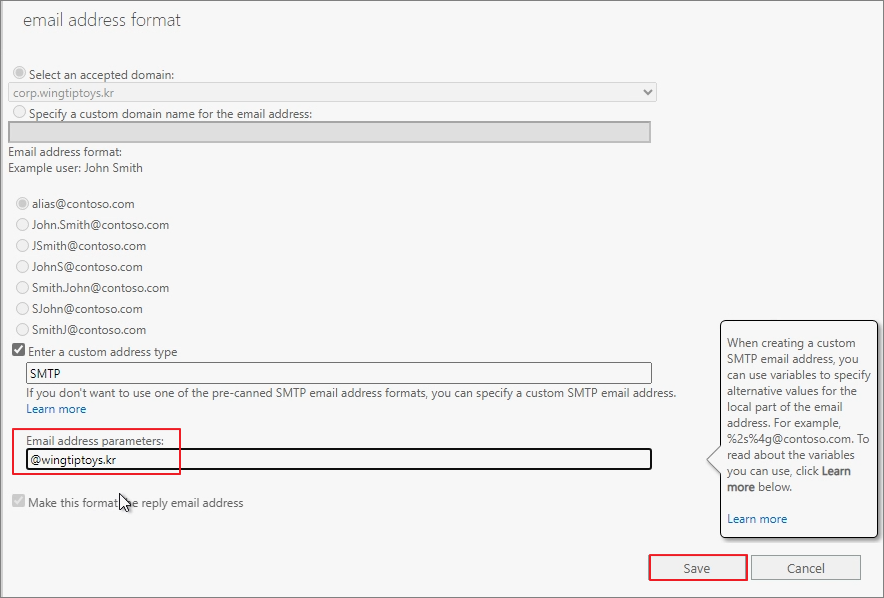
Go to Email address format -> Make the necessary modifications.
Modify the Email Address Parameters.
Save
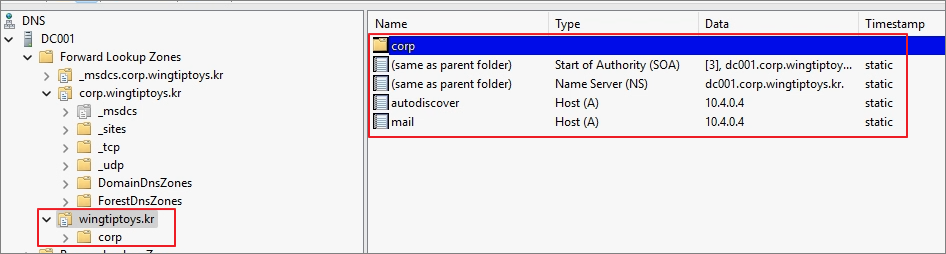
Step 5: DNS Configuration (Must)
Add the values for Autodiscover, OWA, SPF, and MX records to both the internal and external DNS servers. (Refer to the video for detailed instructions.)
Example: Internal DNS
Example: External DNS
Step 6: Install Certificates (Must)
Initially, certificate requests were created through the Exchange Server UI, but recently, I’ve been using the Tool provided by Digicert for its simplicity.
In practice, most of the process is typically handled by the certificate provider.
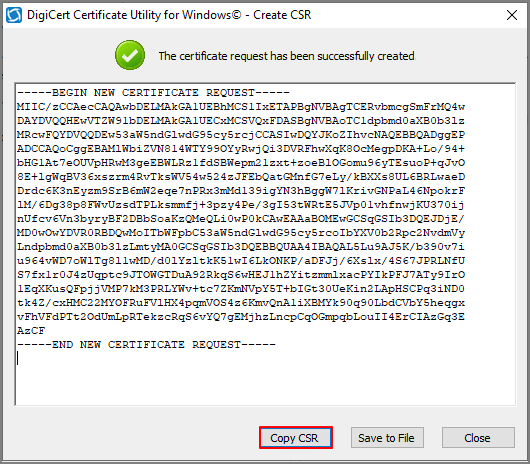
Create CSR
I purchased a Multi SAN (Subject Alternative Name) certificate and have written this guide based on that.
Copy the CSR
Proceed with the issuance process on the certificate provider’s website where you purchased the certificate.
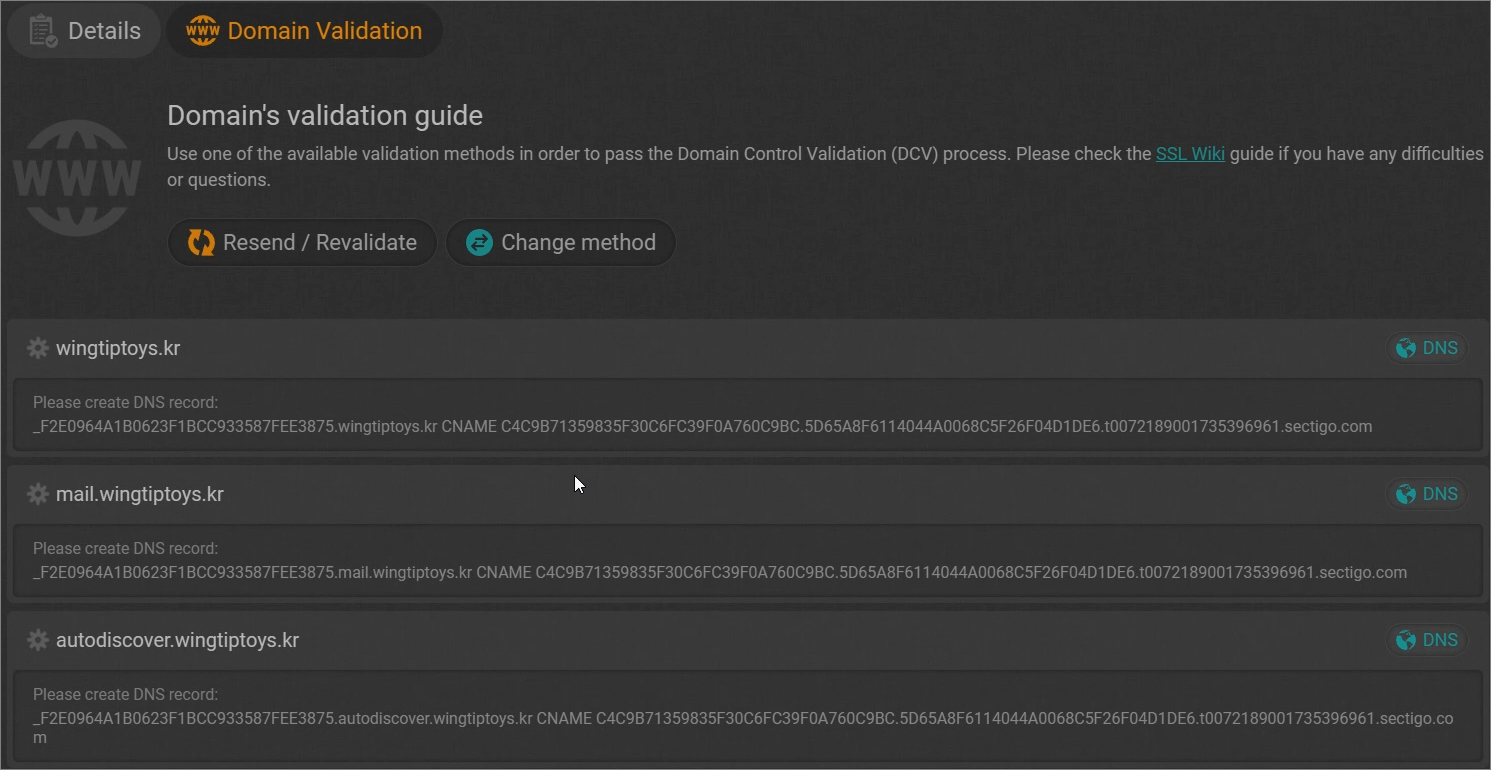
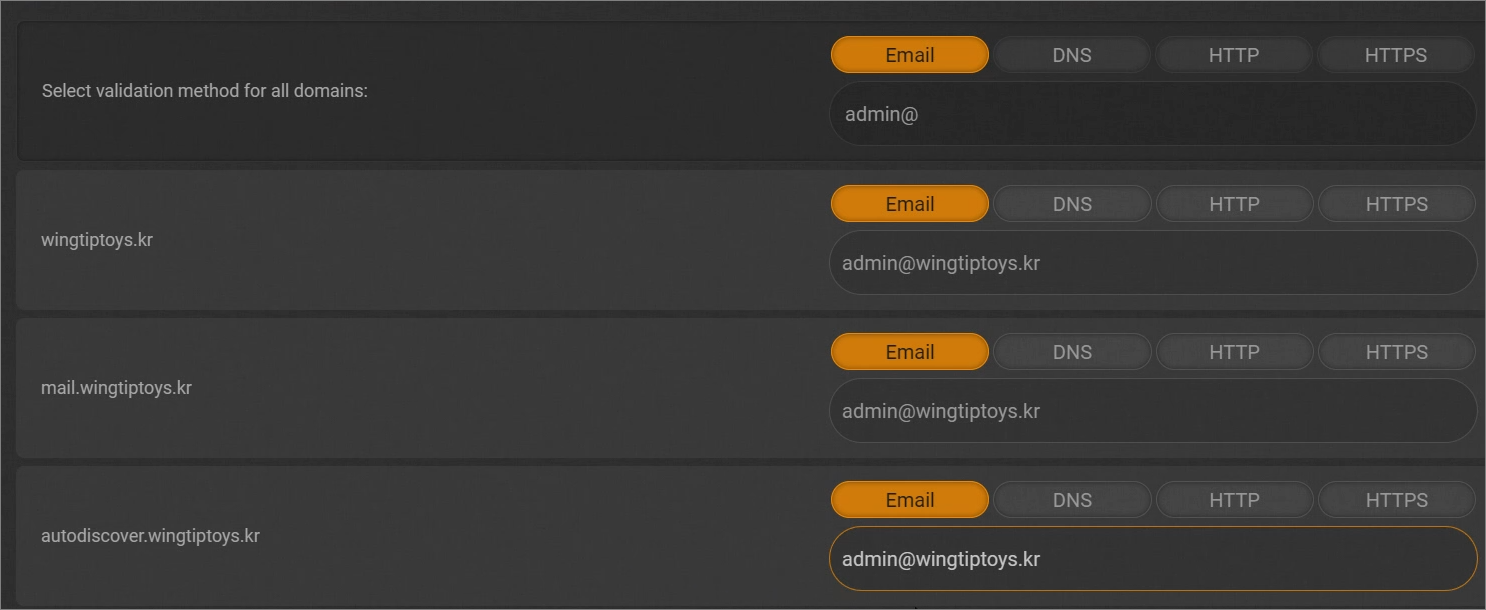
For domain verification, you can either proceed with the DNS verification process or:
Verify the domain by receiving an email and completing the authentication process.
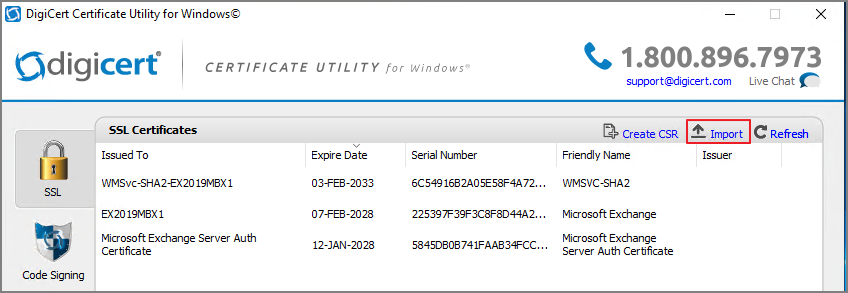
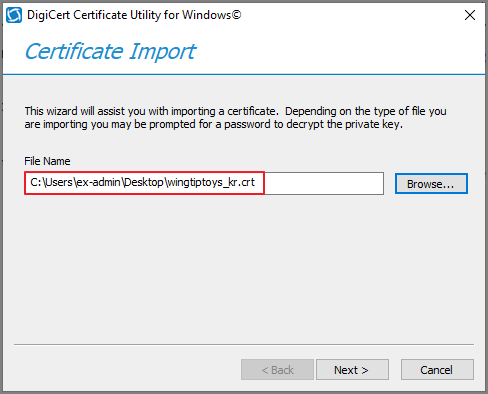
Import the issued certificate into the server.
Specify the certificate file.
Specify a name -> Click Finish.
Verify that the certificate has been successfully installed.
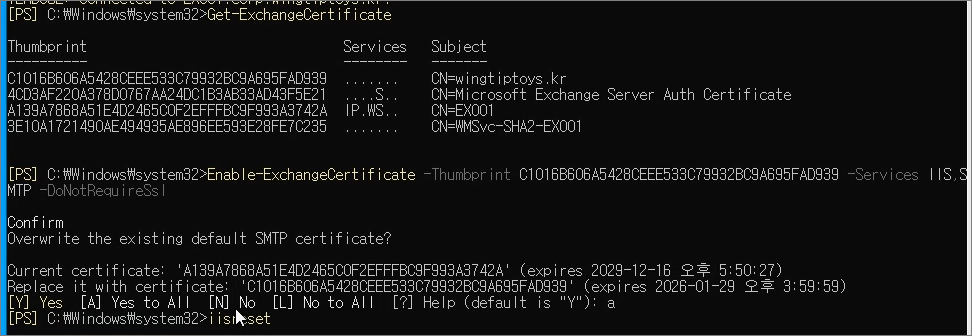
#View the installed certificate.
Get-ExchangeCertificate
#Certificate Binding
Enable-ExchangeCertificate -Thumbprint <Thumbprint> -Services IIS,SMTP -DoNotRequireSsl
#Restart the IIS service (requires running Exchange Management Shell with administrative privileges).
IISReset
Verify that the certificate has been correctly applied by accessing the Exchange Server from both internal and external networks.
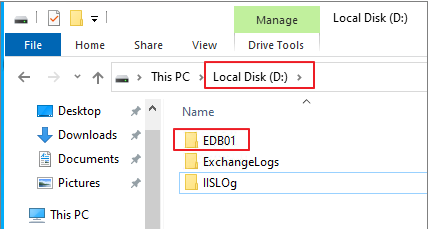
Step 7. Manage Database (Optional)
In a company environment, it is uncommon to keep the database location and the installation path the same. Let's move it to the D drive.
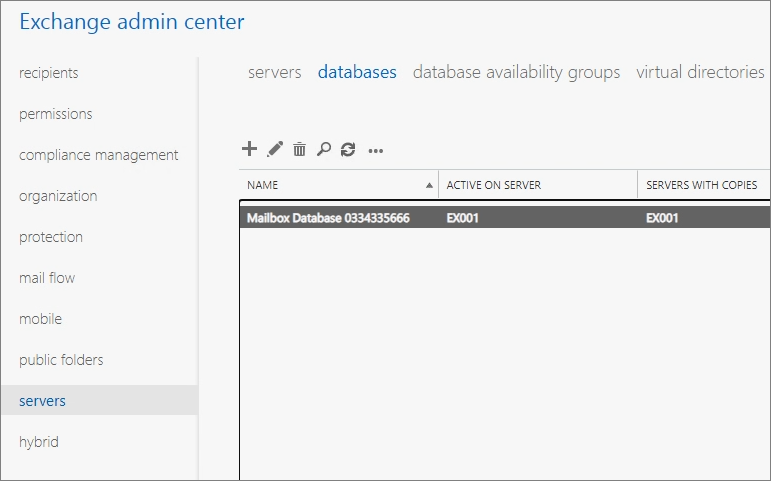
First, navigate to Servers -> Databases to check the default database name.
Perform this process on each server.
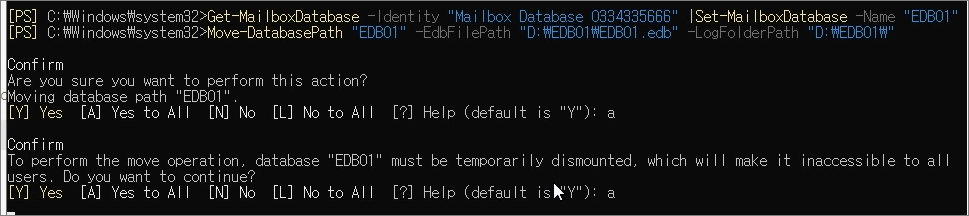
#Change Database Name
Get-MailboxDatabase -Identity "old DB name"|Set-Mailboxdatabase -Name "New DB name"
#Change the database path
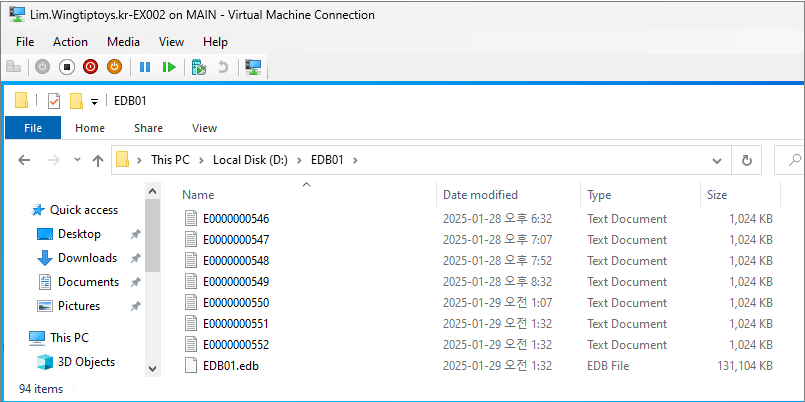
Move-DatabasePath "New DB name" -EdbFilePath "D:\EDB01\EDB01.edb" -LogFolderPath "D:\EDB01\"
You can verify that the .edb and log files have been moved to the specified path.
Check the updated information in the Admin Center.
Since the log files of the database can grow significantly, it is recommended to enable circular logging if you are not using a backup solution.
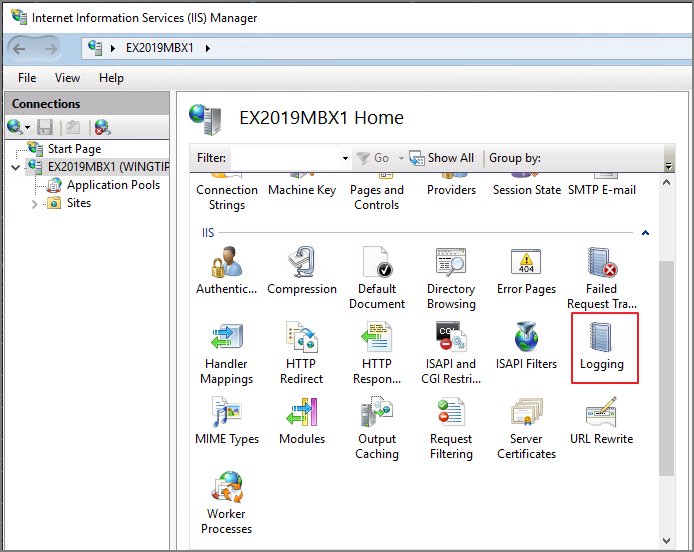
Use IIS Manager to remove the Require SSL setting from the Default Web Site.
%windir%\system32\inetsrv\appcmd.exe set config "Default Web Site" -section:access -sslFlags:None -commit:APPHOST
Use IIS Manager to restore the Require SSL setting for other virtual directories under the Default Web Site.
%windir%\system32\inetsrv\appcmd.exe set config "Default Web Site/api" -section:Access -sslFlags:Ssl,Ssl128 -commit:APPHOST
%windir%\system32\inetsrv\appcmd.exe set config "Default Web Site/aspnet_client" -section:Access -sslFlags:Ssl,Ssl128 -commit:APPHOST
%windir%\system32\inetsrv\appcmd.exe set config "Default Web Site/Autodiscover" -section:Access -sslFlags:Ssl,Ssl128 -commit:APPHOST
%windir%\system32\inetsrv\appcmd.exe set config "Default Web Site/ecp" -section:Access -sslFlags:Ssl,Ssl128 -commit:APPHOST
%windir%\system32\inetsrv\appcmd.exe set config "Default Web Site/EWS" -section:Access -sslFlags:Ssl,Ssl128 -commit:APPHOST
%windir%\system32\inetsrv\appcmd.exe set config "Default Web Site/mapi" -section:Access -sslFlags:Ssl,Ssl128 -commit:APPHOST
%windir%\system32\inetsrv\appcmd.exe set config "Default Web Site/OAB" -section:Access -sslFlags:Ssl,Ssl128 -commit:APPHOST
%windir%\system32\inetsrv\appcmd.exe set config "Default Web Site/owa" -section:Access -sslFlags:Ssl,Ssl128 -commit:APPHOST
Use IIS Manager to configure the Default Web Site to redirect to the /owa virtual directory. (Enter the actual URL you configured in this command)
%windir%\system32\inetsrv\appcmd.exe set config "Default Web Site" -section:httpredirect -enabled:true -destination:"https://mail.wingtiptoys.kr/owa" -childOnly:true
Remove HTTP redirection for the sub-virtual directories.
%windir%\system32\inetsrv\appcmd.exe set config "Default Web Site/API" -section:httpredirect -enabled:false -destination:"" -childOnly:false
%windir%\system32\inetsrv\appcmd.exe set config "Default Web Site/aspnet_client" -section:httpredirect -enabled:false -destination:"" -childOnly:false
%windir%\system32\inetsrv\appcmd.exe set config "Default Web Site/ecp" -section:httpredirect -enabled:false -destination:"" -childOnly:false
%windir%\system32\inetsrv\appcmd.exe set config "Default Web Site/ews" -section:httpredirect -enabled:false -destination:"" -childOnly:false
%windir%\system32\inetsrv\appcmd.exe set config "Default Web Site/mapi" -section:httpredirect -enabled:false -destination:"" -childOnly:false
%windir%\system32\inetsrv\appcmd.exe set config "Default Web Site/owa" -section:httpredirect -enabled:false -destination:"" -childOnly:false
%windir%\system32\inetsrv\appcmd.exe set config "Default Web Site/powershell" -section:httpredirect -enabled:false -destination:"" -childOnly:false
%windir%\system32\inetsrv\appcmd.exe set config "Default Web Site/rpc" -section:httpredirect -enabled:false -destination:"" -childOnly:false
Restart IIS
IISRESET
If there are multiple production servers, repeat the same process on all servers.
How to Verify Functionality:
On a client computer, open a web browser and enter the URL: http://<ServerName>
Verify that the request is redirected to Outlook on the Web (HTTPS) and confirm that you can log in.
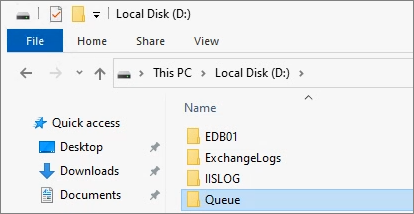
When emails accumulate in the queue, the Mail.que file increases in size. If it reaches a level where disk space becomes insufficient, the Transport Service will stop. To prevent such service disruptions in advance, the location of the Queue DB is often changed and managed.
Create a new folder for the Queue DB. (In the test environment, it was set to the D drive, but in a production environment, it is recommended to use a location separate from the database.)
Step 13. Specify the Offline Address Book (OAB) (Optional)
Assign the Offline Address Book (OAB) to each database.
This concludes this post. When delving into details, each item has its own prerequisites. If the opportunity arises, I will cover each topic in greater detail.